


To start
- You will need a mobile or desktop device to use it. Notion is available for installation and can be run in browser form on Mac, Windows, iOS, and Android environments.
- If you do not yet have a user account, you can create one for free here: Notion registration
- You can download the mobile app from here: Notion mobile app
- You can get the desktop app from here: Notion desktop app
- After downloading and installing, follow the on-screen instructions and create a user account.
How to use the Notion application?
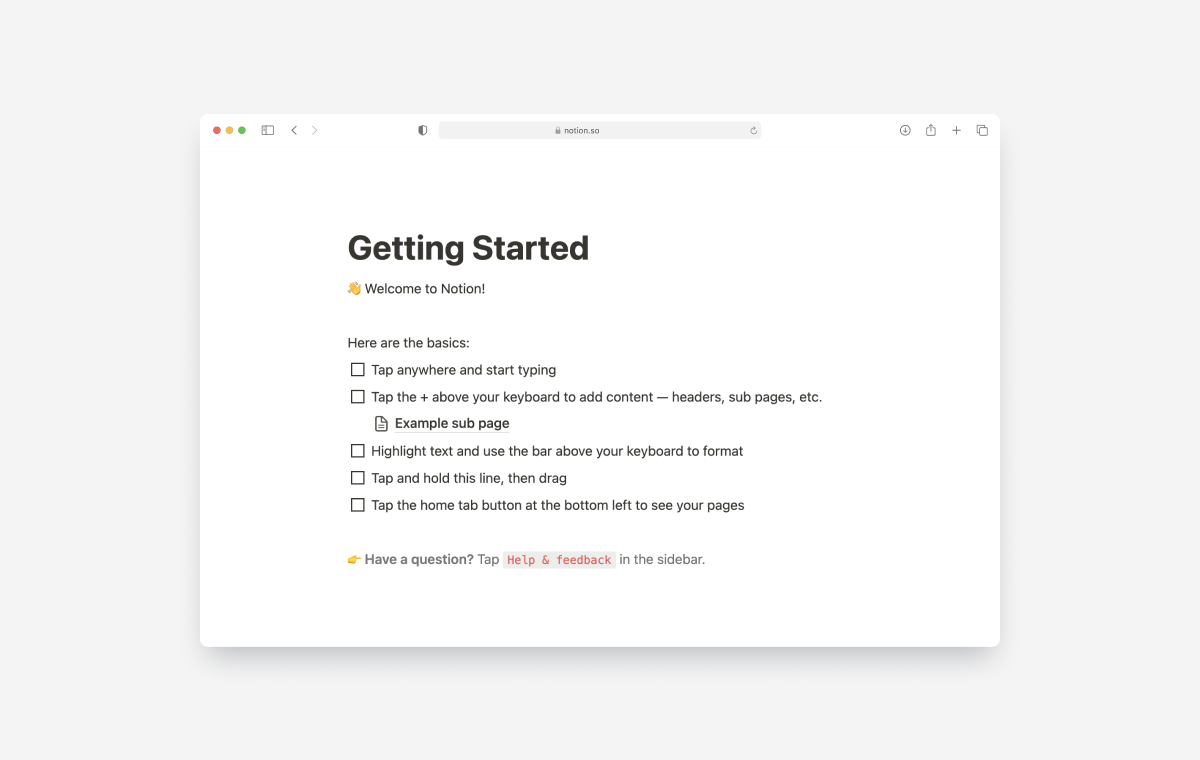
After logging in, you will find yourself on a sample page automatically created by Notion. You don’t need to keep these pages, you can freely delete them. Before deleting, please browse through the content as it helps a lot in learning the basics of the application.
If you would rather not spend your time reading pre-made pages, continue with this guide. 😉
Basic Notion functions:
- Note taking. Click anywhere and type freely.
- Content menu. Press the “ / ” key to invoke the content menu: create text, make subpages, write to-do lists, upload images, create database views, etc. A wide range of possibilities are at your disposal.
- Text formatting. Select any text and format it freely using the appearing style menu.
- Drag and drop. Hover the mouse over a line, look for the “dotted lines” that appear before the line, click and hold the mouse button, and move the line wherever you want. This function is usable for all content types. Isn’t it great? 🙃
- New page. Click the “New page” or “Add a page” button in the sidebar to create a new page.
- Templates. Choose the “Templates” button appearing in the sidebar if you prefer working with pre-made pages and database structures.
How to navigate in Notion?
Once you get to know the structure, nothing will stand in your way.
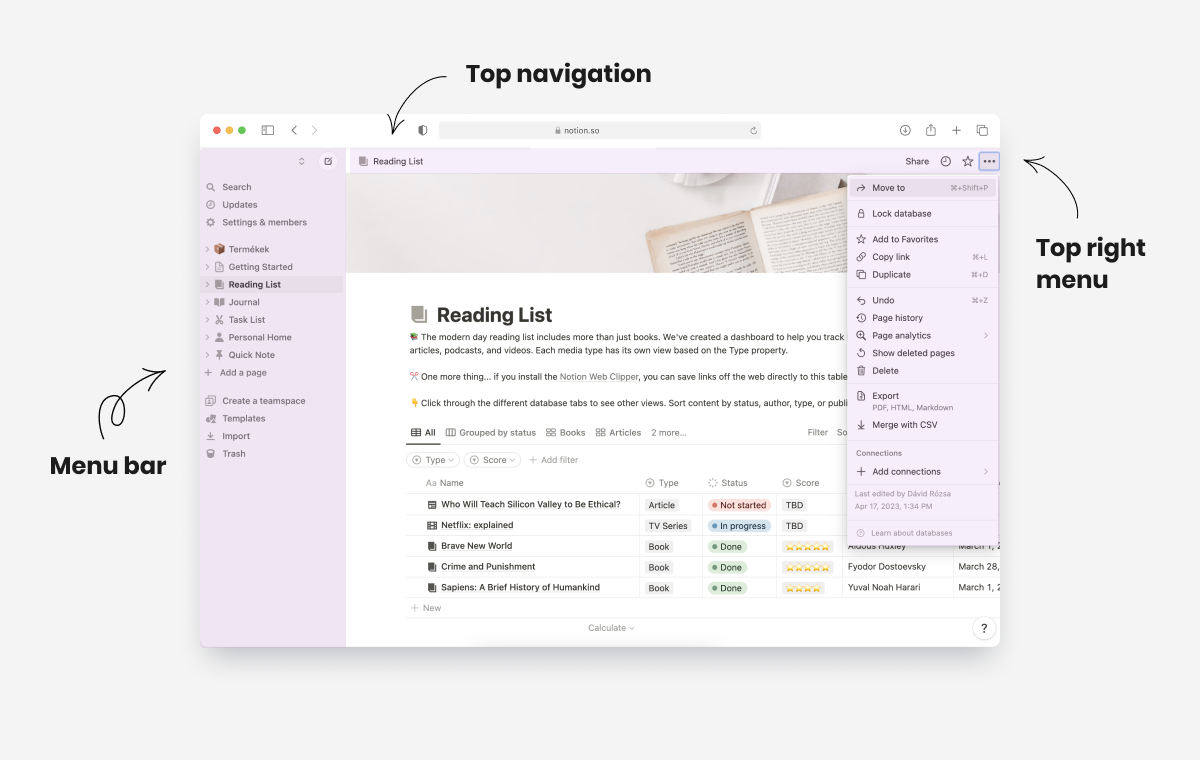
- Menu bar. The bar on the left contains pages, settings, and customization options.
- Top navigation. Use the arrows and links in the header to navigate between your open pages.
- Upper right menu. In the upper right corner, you will find menu items related to collaboration, communication, and formatting.
How to add a new page or subpage in Notion?
You can do this in several ways.

One way to add a new page is to:
- Click the "Add a page" button in the sidebar to create a new page, then
- Click the “+” button next to the page name appearing in the sidebar to add a subpage.
After that, you just need to fill the pages with the desired content. A page can contain a variety of content, such as text descriptions, uploaded files, links, databases, and much more.
You can add a subpage by clicking the “+” button next to the added page or after opening the subpage.
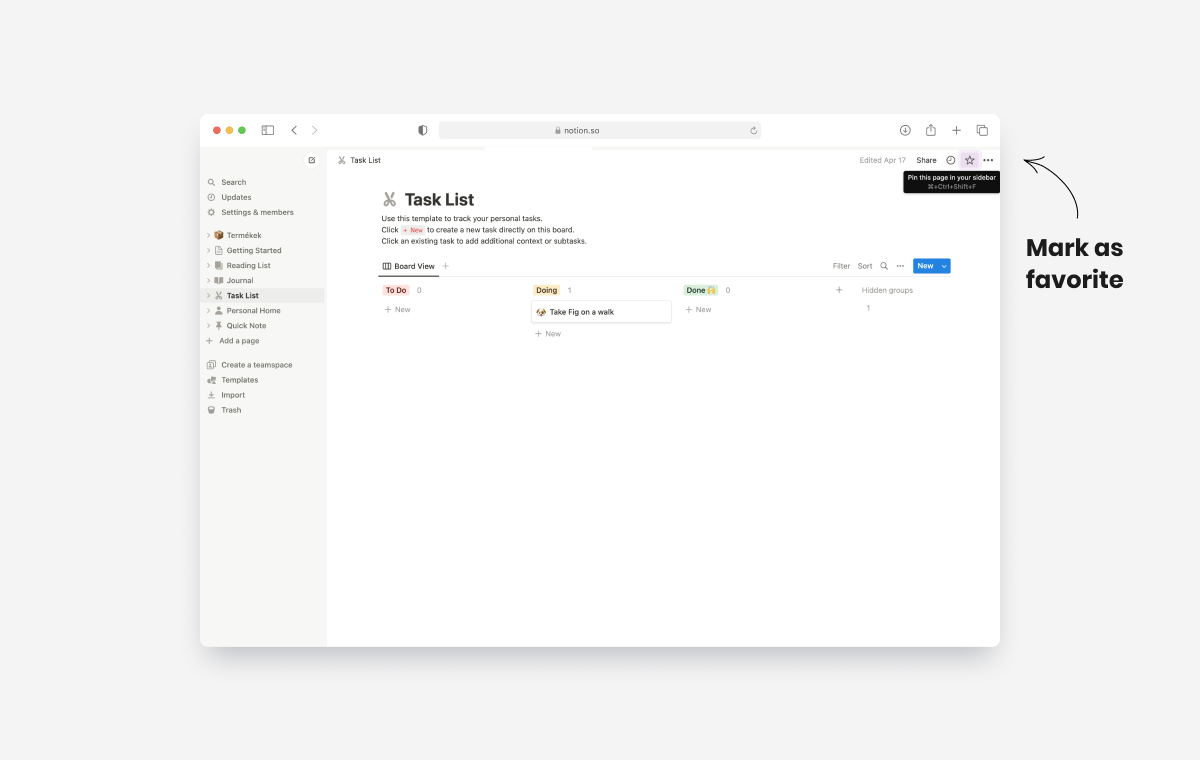
How to mark a page as a favorite?
If you use a page frequently and don’t want to dig deep into the page structure, mark it as a favorite. A “Favorites” category will be created in the sidebar, from where you can access the desired content faster. To mark a page as a favorite, click the star icon in the upper right corner.
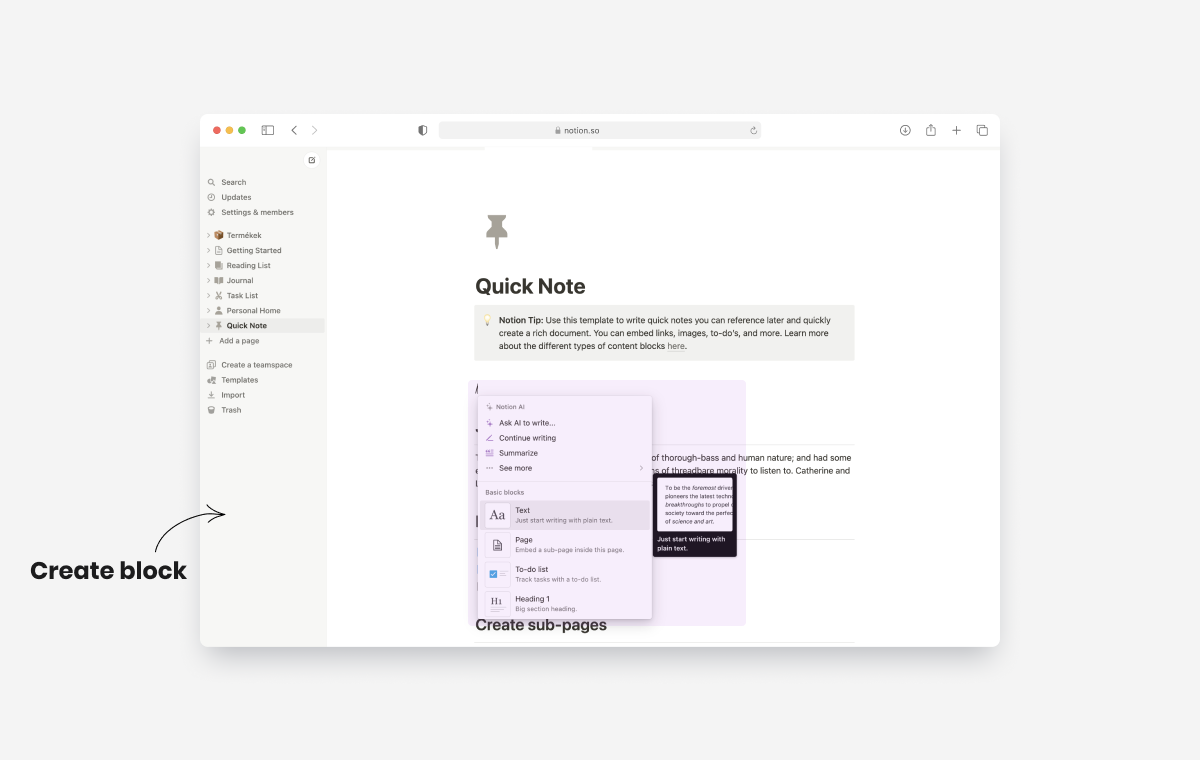
What is a block and how to create it in Notion?
In Notion, a block is a content unit used to build pages. Blocks can contain text, images, videos, databases, and many other content elements.
To add a block, simply click on an empty spot within the page, choose the “+” icon appearing on the left edge of the page, or type the “/” symbol to display the block menu. Choose a content element and fill it with data.
The most commonly used block types:
- Text
- Heading
- To-do list
- Toggle list
- Bulleted list, Numbered list
- Table
- Image
- Callout
- Divider
- Database
What to know about Notion databases?
Notion databases are categorized, tabular data surfaces that allow you to store information in a structured and easily searchable way. Databases enable filtering, sorting, grouping of data, and building relationships between them. Pages stored in databases can contain further subpages and are customizable as desired.
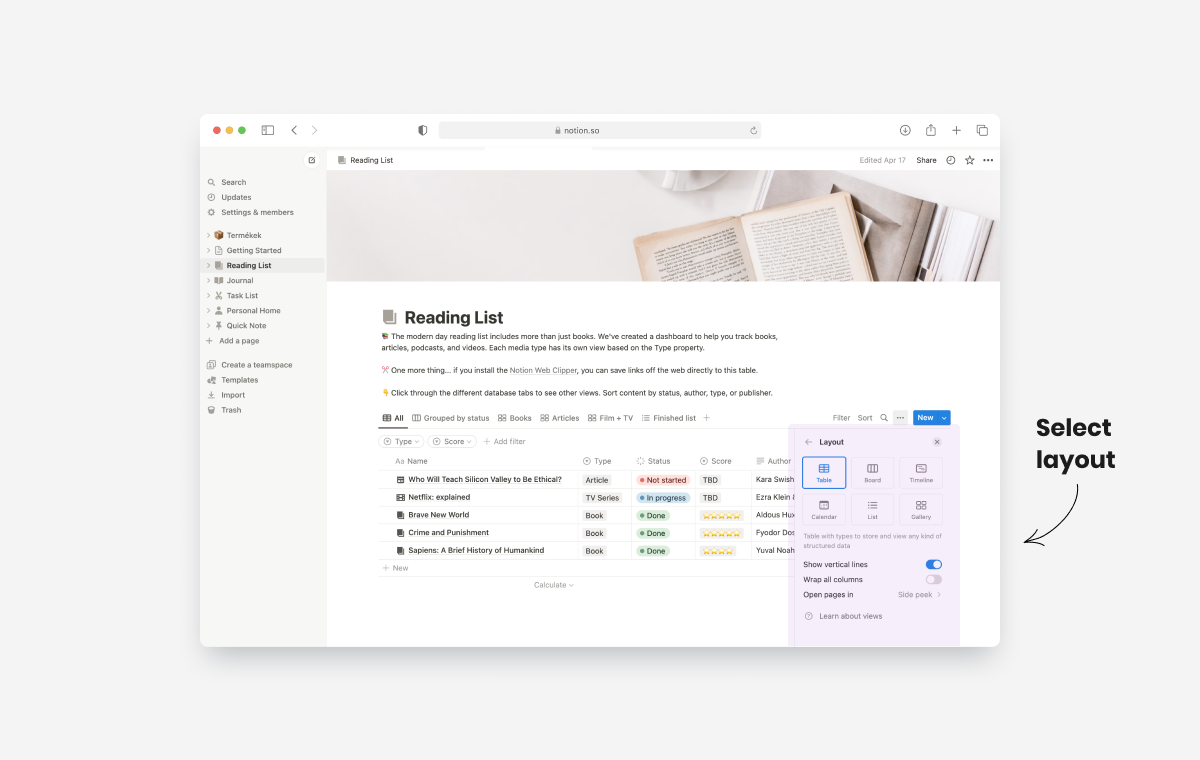
A database can have multiple, different views. Thus, you can display the same content with different emphasis, in more or less detail. You can choose from the following views:
- Table. The well-known table view with rows and columns, Notion style.
- Board. I call this Kanban view since it organizes your database data into columns according to the Kanban method (e.g., idea, in progress, done). Naturally, you determine the organizing principle, that is, the types of columns.
- Timeline. You can see the data by date, row by row.
- Calendar: Also ranks by date but adds a calendar view.
- List. Organizes the recorded data into a list, which you can then arrange and filter as you like.
- Gallery. An ideal choice for images and files. Depicts your content as cards, giving more emphasis to each block.
Sharing and making public in Notion
In the Notion app, you can share your content in two ways. You can either send an invitation to the people you select, or make parts of your page public.
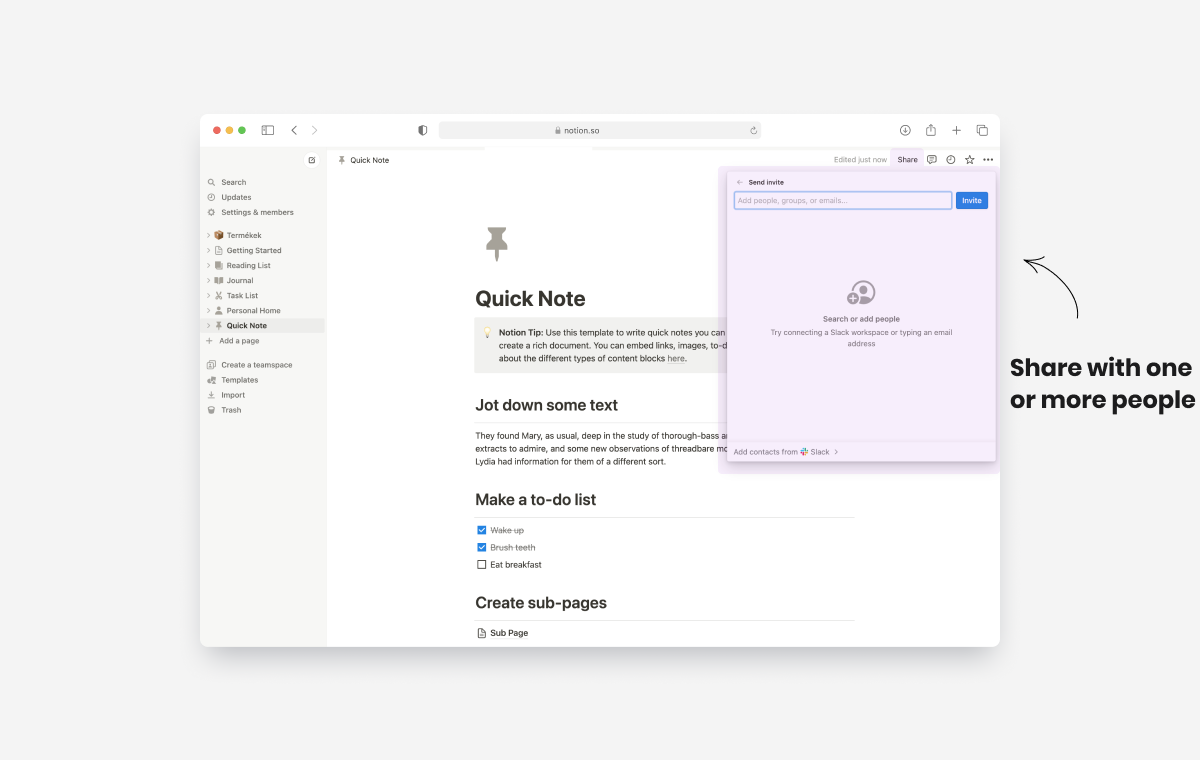
Sharing your content with one or more people:
- Click the “Share” button in the upper right corner.
- Click into the input field that appears (“Add people, groups or emails…”)
- Type the invitee's email address and choose an authorization level (on the right side).
- Click the “Invite” button.

Making your content public (e.g., website, resume, etc.):
- Click the “Share” button in the upper right corner.
- Toggle the “Share to web” switch to the on position. Your page and the subpages linked from it will immediately become public. Copy the unique URL from the field and paste it wherever you want or share it with anyone, regardless of whether they use Notion or not.
- You can control whether your page can be commented on, edited, duplicated, or searched. Please pay attention to this because duplication is enabled by default. If you don’t want your content to be copyable, turn off the “Allow duplicate as template” switch.
Collaboration in Notion
You can share your content with up to 10 people in the free package. Invite your family members and friends as described in the sharing section. If you upgrade to a larger package, you can share your thoughts with more people, create workspaces for collaboration, and benefit from many other useful features.
How to use the Notion app effectively?
Notion is an extremely powerful app if used correctly.
- Strive for order. Delete unused pages, keep your pages organized, so it doesn’t cause headaches to use.
- Avoid clutter. Don’t cram everything onto one page. Use Notion blocks. More details above.
- Use commands. Learn a few “shortcuts” (keyboard shortcuts) to save even more time. Look, here I’ve gathered the most commonly used commands.
- Use databases. To facilitate organizing and reusing data, create databases if possible. Notion’s foundations are built on databases, take advantage of their benefits.
- Start with pre-made templates. You can build your system alone but rely on a proven and widely used template.
How can you start using Notion the fastest?
With pre-made templates, you can not only start organizing your tasks sooner but also get to know the possibilities within Notion.
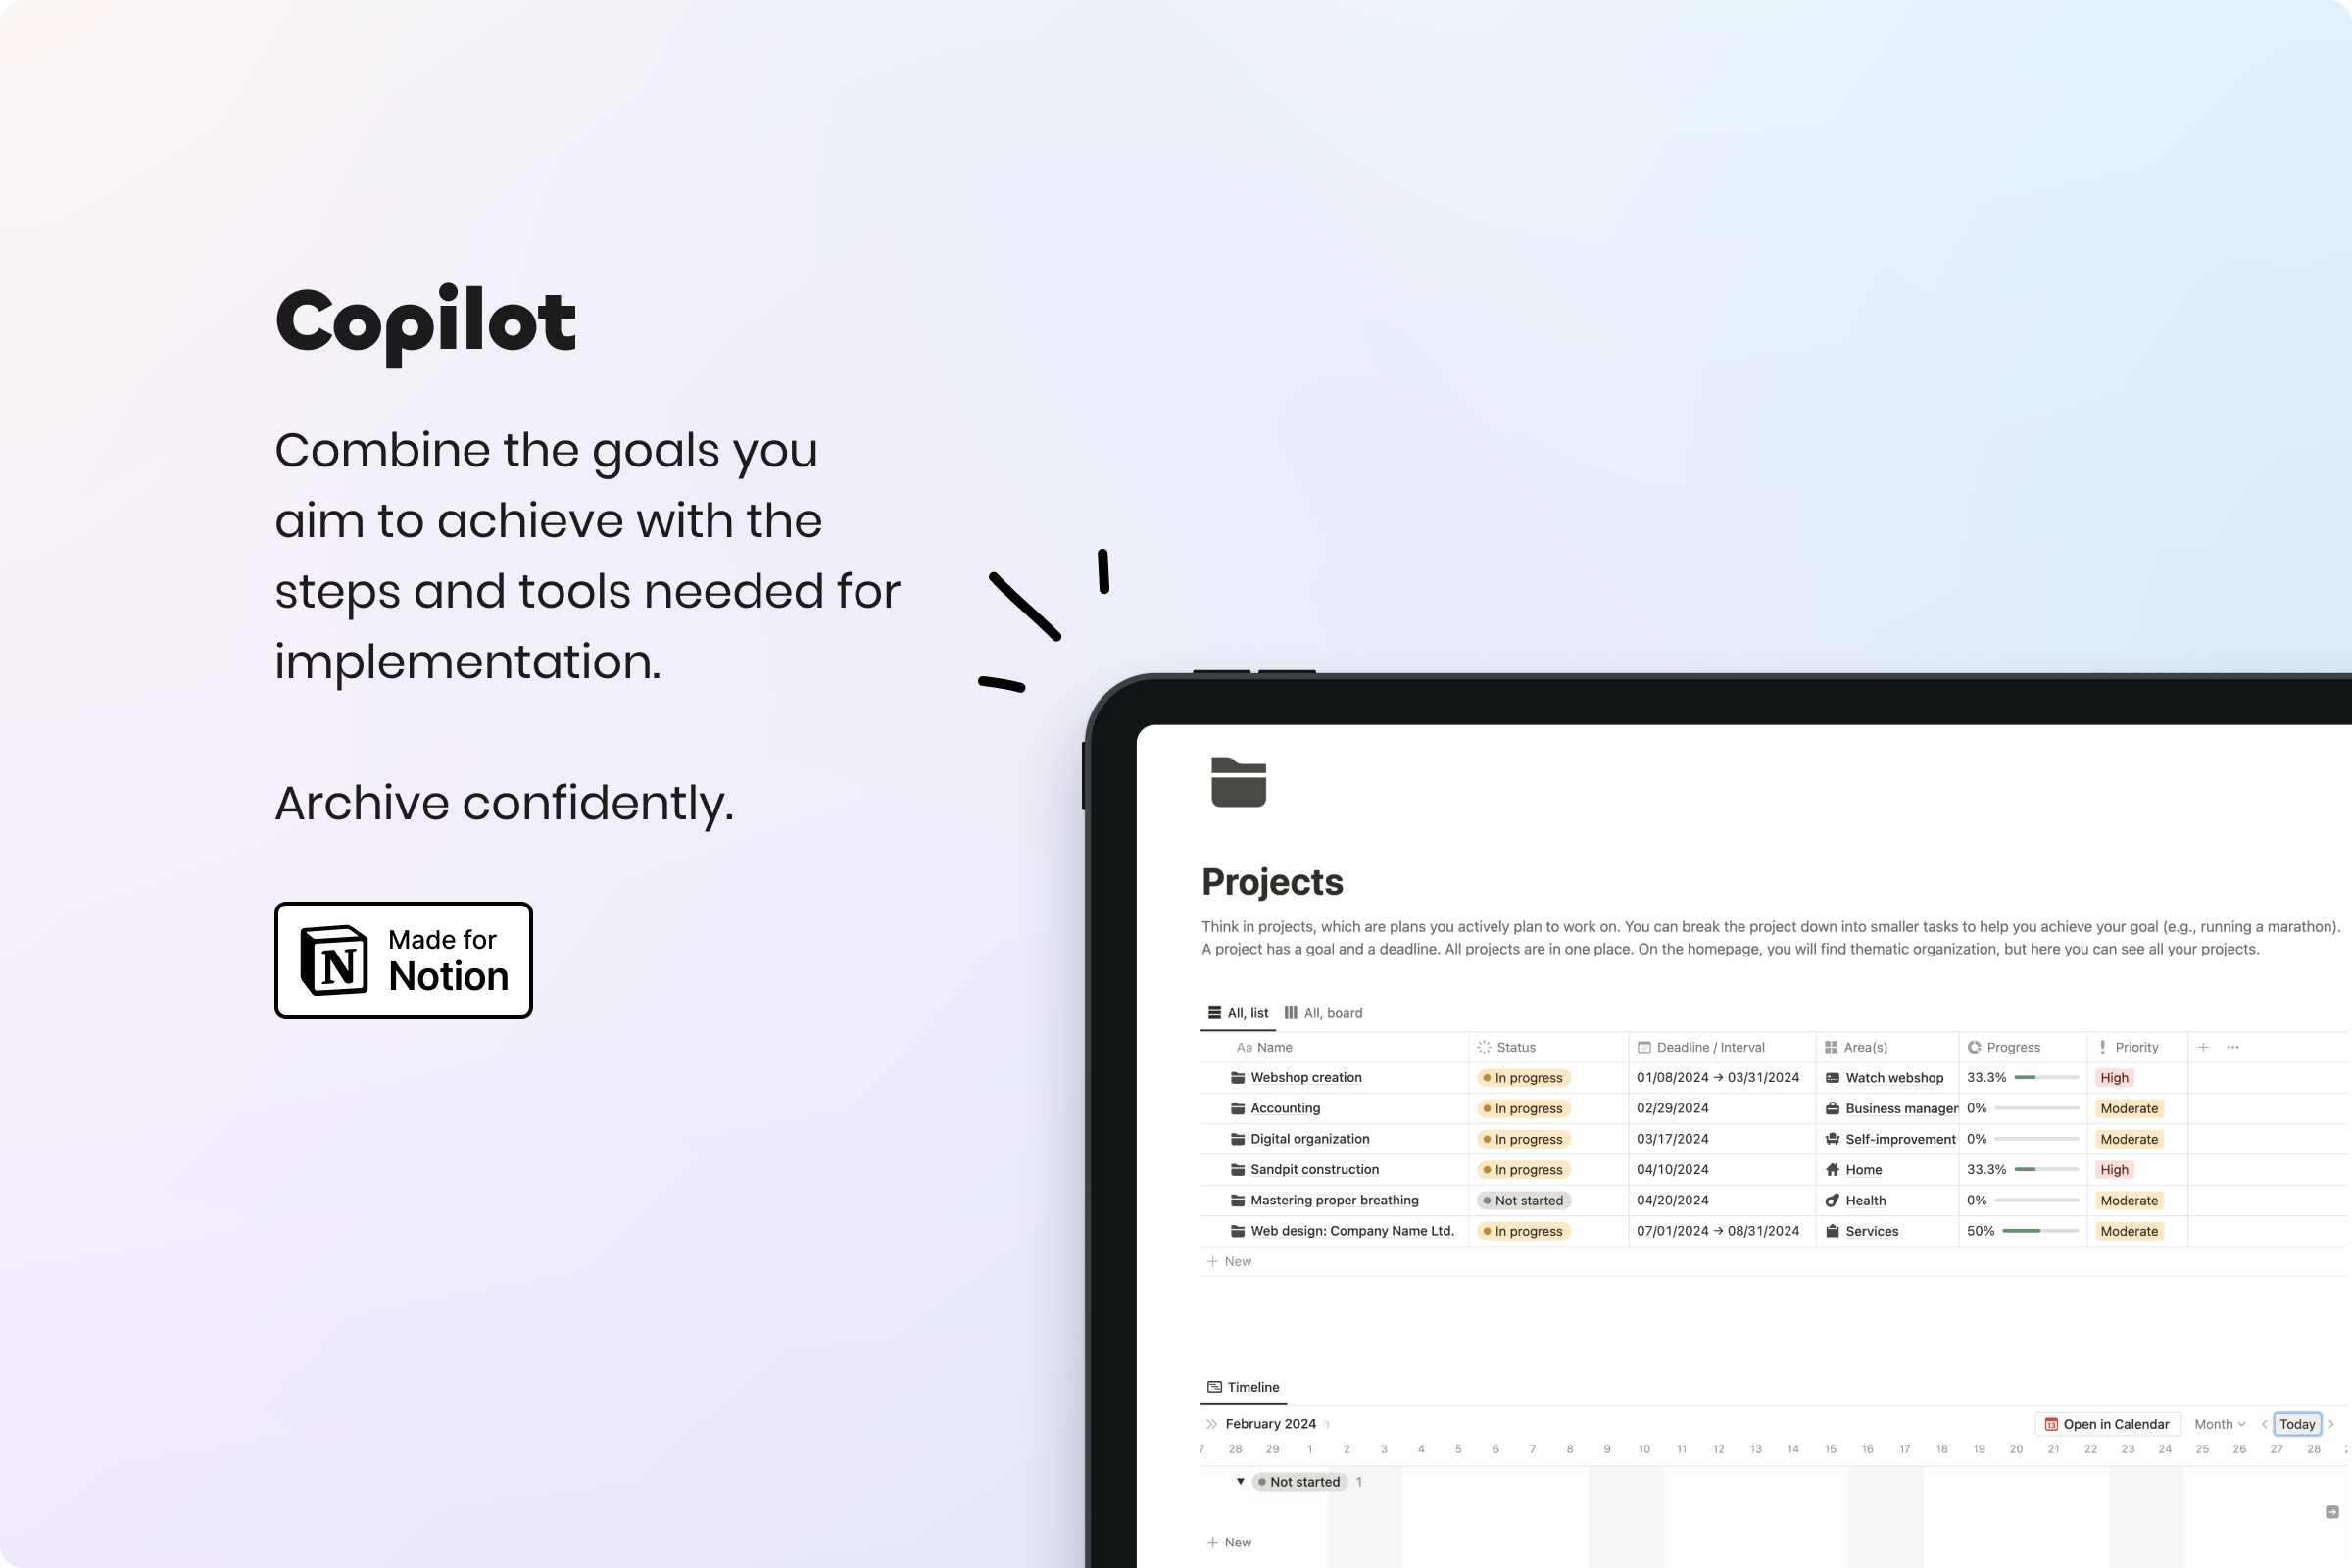
Notion is an extremely versatile digital tool that can be used in various areas of life. With the use of Copilot the Notion application becomes an information center in your hands. All notes, ideas, tasks, and progress can be accessed in one application. It helps you focus more on creation and relax more effectively.
Start using Copilot to organize your daily life.
What does the Notion Copilot include?
- Areas. Organize by areas. Have a main organizing principle for your tasks, under which you list your goals, projects, and tasks (e.g., sports).
- Goals. I know you have goals too. Everyone does. Write them down (e.g., run a marathon).
- Projects. Think in projects, in other words, tasks that you really want to accomplish (e.g., preparing for the marathon).
- Tasks. Break your project into small steps so you can see the path to the goal (e.g., run 5 km daily).
- Resources. Don’t let valuable blog posts, books, links get lost. How many open tabs are there in your browser? Right, don’t store useful info in your browser but assign it to the
- Archiving. Eliminate the clutter and set aside tasks that are not due, closed, or have been completed long ago. You can activate them anytime if you need them.
In summary
After a little practice, you can easily become dependent on Notion. This guide showed you the basics. Try them out, create your own pages and databases, or save some time by using my carefully tested free and premium templates.
If you want to know more about using Notion, subscribe to my newsletter, follow me on social media channels, or visit back later. I have plenty of useful information in store.
Thank you for reading my tutorial. 🙃
P.S.: Thank you for registering via the affiliate link in the article; this way, you not only get access to an efficient app but also support my work. Win-win. 👏🏼


